Sourdough bread is so simple to make as long as you know the right steps to take. In this post, we will go over the wonderful recipe created by Kathleen Allenbach, founder of the San Diego Artisan Bread School. This is a very forgiving recipe that will help you have sourdough success every time. What makes this sourdough bread recipe for busy people so great is that it can be broken up into easy-to-follow time amounts. That means you can schedule your bread into your busy day and still eat wholesome amazing sourdough bread at home!
This recipe will make two plain sourdough bread loaves. The intention with this recipe is to give you a really solid, easy-to-bake, bread recipe that you can fit into a busy lifestyle. Now, just because you’re busy does not mean that this will be fast. This is a traditional bread recipe, we have just grouped when you need to do things so you have a good idea of when you need to be around the dough and when you don’t.
Baking sourdough is slow and for good reason. Unlike a quick yeast or active yeast bread. Sourdough captures its yeast from the air around you. It cultures this yeast in the form of a starter. You are probably familiar with sourdough starter and for this recipe, we are assuming that you are. As you build up the dough, you also need to build up the yeast, and that takes time. Time also helps the gluten in your dough to form and mature into a well-built gluten web, this is what will capture all that lovely air that your yeast will output. Finally, the best reason for a slow process is flavor, the more that yeast works on the flour, and the more that gluten can capture the output from the yeast, the better the flavor will be. For these reasons, please do not try to speed up the process. By shortening the time, you will be exposed to things going awry and we want you to be confident that your bread will come out fantastic every time.
What you will need to make this sourdough recipe
If you have made bread before, these may be things that you already have on hand. If you are new to sourdough and are trying to fit it into your schedule, then here is what you need. Most of these items are relatively cheap and will last you a long time.
Mixing Bowls: This is something that you probably already have but it is good to call out that you will need more than one. You will need one for your preferment, and one for your mixing and rising.
Banneton Bread Proofing Baskets: These baskets are relatively inexpensive and will help you proof your bread. this is the stage right before baking. You can try to substitute these with a tea towel-lined strainer, but again bannetons will give you the best result.
Bread Lame: This is a special tool that holds a razor blade and will help you score your loaves. You can use just a razor blade or an extremely sharp knife, but this tool will help you be more consistent in your scoring.
Tea Towel: A towel is a very handy thing in bread baking. It will cover your dough while it rises and proofs. It can help clean up wayward flour, and it will keep your loaves from sticking in your banneton. You probably already have some but it is worth mentioning here.
Bench Knife: A bench knife is a flat-edged tool used for scraping a workbench. It is also very handy for dividing, shaping, and lifting dough.
Kitchen Scale: Bread baking is made more accurate by measuring ingredients by weight. We encourage this in this recipe, we will not be providing an alternative measuring system.
Dutch Oven: Dutch ovens help to keep the steam in and around the bread as it bakes, this allows the bread’s exterior to stay hydrated and expand during the baking process. This results in a better oven spring. If you don’t have a Dutch oven, you can use a pan of water-soaked towels on the lowest rack in your oven. Never, spray water into your oven, this could cause the glass window to shock and break. Using this type of Dutch oven in the link helps since you can use the pan upside down. This helps to get the bread in and out of the oven.
Bread Storage Bags: If you are serious about baking bread, you will likely bake more than you can consume. Having these storage bags are great for proofing in the refrigerator as well and gifting bread to family and friends.
Getting Started
We will be structuring this sourdough bread recipe into phases to help you plan out what you will be doing and when you will be doing it. The recipe will take 3 days to complete from the first phase to the last. Most phases will be completed within minutes and then there will be a waiting period for the dough to react. The phases are:
- Feeding the starter
- Making the preferment
- Building the dough
- Shaping the dough
- Proofing
- Baking
- Cooling
By structuring it this way, we hope to give you an accurate time range that it will take to perform the needed steps. Since many of these phases have a lot of small steps, we are confident that you will be able to fit this into your busy lifestyle.
Feeding the starter
The first thing when making Sourdough bread is to remember to feed the starter. An active starter will create a great foundation for a great loaf of bread. An inactive starter could waste a lot of time and ingredients. Do not overlook this crucial step. Feed your starter as you normally would 4 to 6 hours before you make the preferment. You should try to feed your starter between 2 pm and 4 pm. This will set you up nicely to have your preferment happen overnight. When feeding my starter, I generally keep 50 grams of starter, 50 grams of water, and 50 grams of organic all-purpose flour. Set this mixture out on the counter. When the starter is active, you will see lots of large bubbles in the starter. Mixing the Starter should only take a few minutes, less than 5.
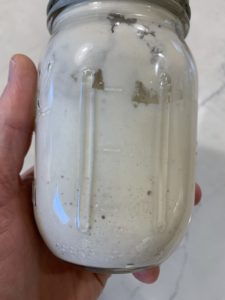
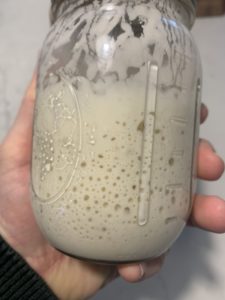
Making the preferment
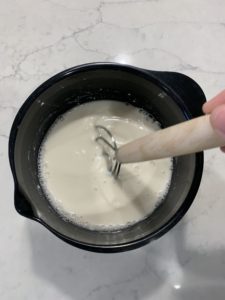
The preferment is a portion of active starter, water, and flour that you will let develop overnight. By including this step and not just using more starter at the outset, you will be creating more flavor in your dough and strengthening the yeast. To complete this step, mix 30 grams of fed sourdough starter with 120 grams of water. Then mix in 120 grams of all-purpose flour. Mix these ingredients in a small bowl and leave them on the counter overnight. You should try to make your preferment between 8 pm and 10 pm depending on how active your starter is. The goal here is to have around 12 hours for the yeast in the starter to fully activate in the preferment.
A quick note about flours. Not all flours are created equal, some are made with more protein like bread flour, and others are made with less like cake flour. You can experiment with using different flours at different times and for different recipes. For sourdough starters, preferments, and even sourdough bread loaves, you should stick to unbleached all-purpose flour. Un-bleached is key since the bleaching process is just as it sounds, toxic gasses that are used only to make the flour whiter. Also, never use self-rising flour which contains other chemical leavening agents that will distort your sourdough processes. In this recipe we will be recommending you add whole wheat flour for nutritional reasons but you can complete this recipe using only all-purpose flour.
Making the sourdough bread dough
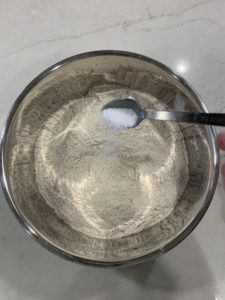
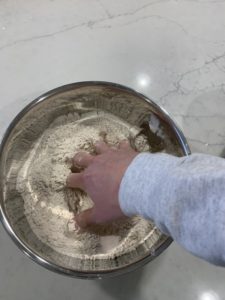
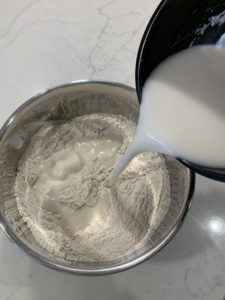
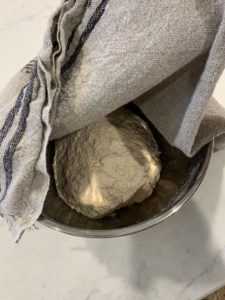
This will be where the majority of your time will be spent. Again, there is not a lot of working time, but you can’t wander too far away while the dough is being worked. In this step, you will be building the dough structure and shaping the dough so that it will be ready to bake. The morning after the preferment was made, mix the preferment with 520 grams of water. Then mix 600 grams of all-purpose flour, 200 grams of whole wheat flour, and 3 teaspoons of salt in a large mixing bowl. Add the water mixture to the flour mixture and mix until it becomes one mass. At this point, the dough will be shaggy and rough. To help with mixing, you can use a bread whisk, but I feel the best and most fun way is with your hands. This will help you get a feel for the dough and help you know if there are pockets of unmixed flour. You are looking to get a fairly evenly mixed dough. Cover this dough with a tea towel and let it sit for 1 hour. This step should only take you 10 minutes or so to complete. I generally squeeze this task in around doing other household tasks like laundry, dishes, making breakfast, etc.
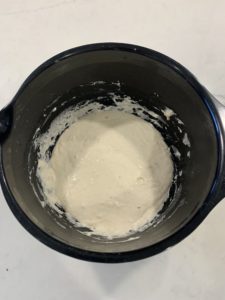
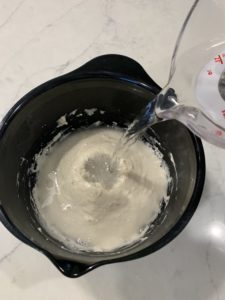
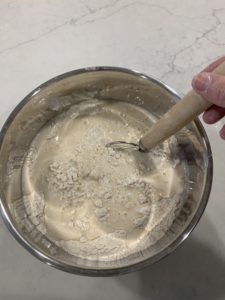
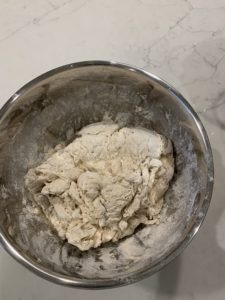
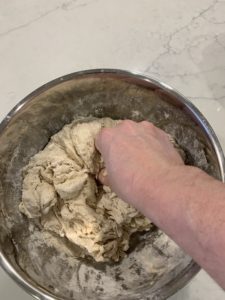
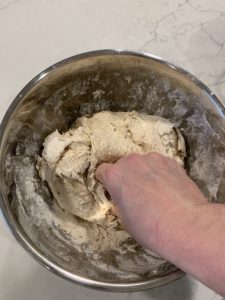
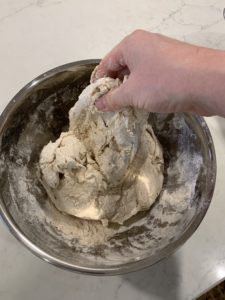
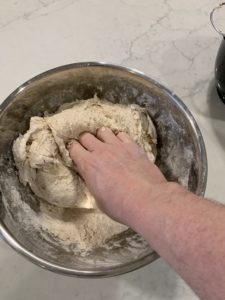
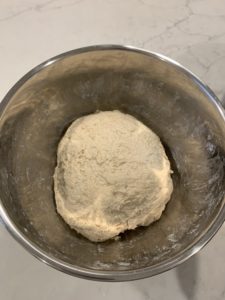
After an hour you will begin folding the dough. The idea in this series of steps is to gently stretch the dough. By stretching the dough you will be developing the gluten strands into a web. You will also see the dough relax, and become smooth and elastic. To complete this step, you will be doing what is called a letter fold. You will do this 4 times, each with a 30-minute break in between each series of folds.
How to letter fold sourdough for sourdough bread
To complete one letter fold, grab one side of the dough, as it rests in the bowl. Pull it up until you feel the dough stretch, do not rip the dough but stretch it. Then place that portion of dough in the center of the bowl. Then do the same thing to the opposite side of the bowl. Finally, repeat those steps on each side. you should now see why it is called a letter fold since the four sides come together in the same of a letter. Remember to cover the bowl with a towel while you wait 30 minutes between each series of folds. As the dough sits between folds you will notice the texture becomes more smooth and elastic. See the last photo in the gallery and compare it to the first letter fold photo.
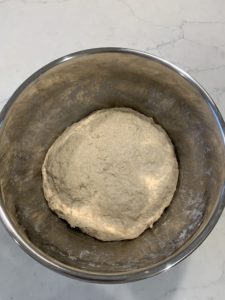
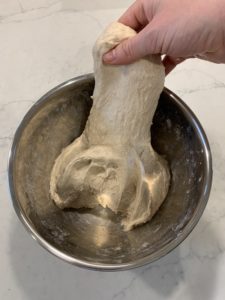
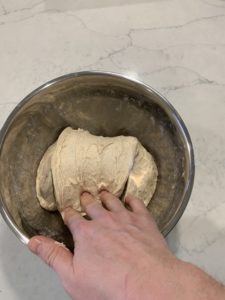
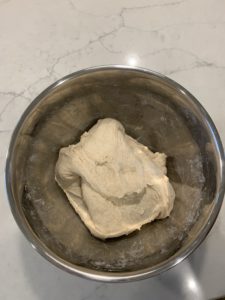
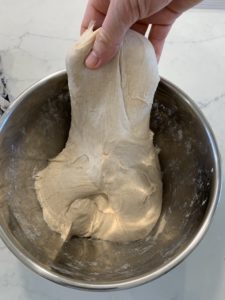
This portion of the recipe should take you an hour and a half. After your 4th letter fold, you will let the dough rest for 60 to 90 minutes. This rest time will allow your dough to relax and your yeast to develop further. Simply cover the bowl with the tea towel. This would be a good time to do a larger task that may take more concentration than the previous steps would allow.
Shaping the dough
So now you are about 3 and a half hours into the work on day 2. Good news, Shaping the dough will move fairly quickly. In this phase, you are primarily focused on slowly shaping the dough before the proofing phase. Again, the goal is to gently stretch one side of the dough to build surface tension and structure in the dough. Start by removing the dough from the bowl and placing it on to a counter or a large cutting board. Do not flour or grease the surface before placing the dough. Cut the dough into two equal pieces. You can weigh the dough to be exact but eyeballing it will work here too. These two pieces will become your loaves.
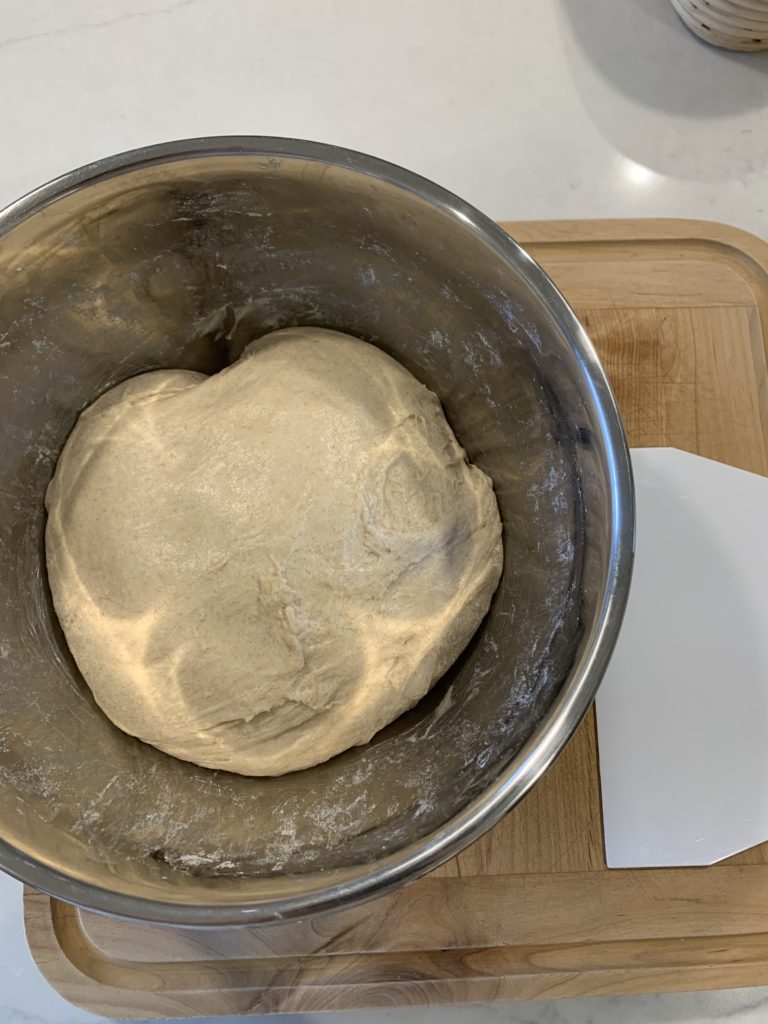
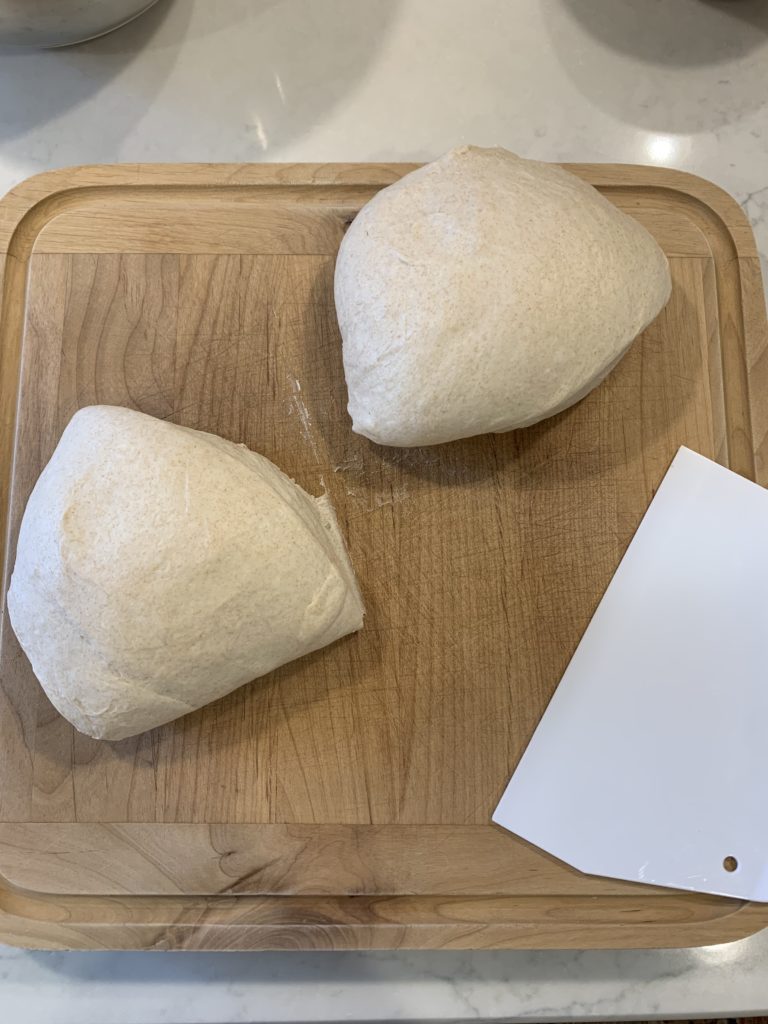
Pre-shaping the sourdough bread loaves
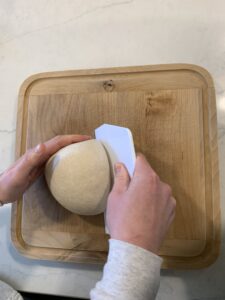
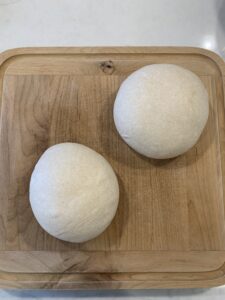
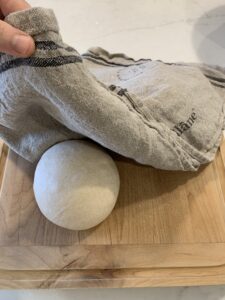
To complete this step you will need your bench knife. Start by placing the bench knife vertically on the far side of the cut piece of dough. Slowly pull the dough ball towards you. You should see the side of the dough ball closest to you start to stretch as the dough that is stuck to the counter is pulled toward the knife. You can scoop up the dough ball and place it back away from you to do another pass. Next, rotate the bench knife 45 degrees, and using your other hand repeat the same step as before. This time you should see the dough ball get tight and round. You can repeat this step as needed to get a tight round ball. Do not do this so much that the side that we are pulling toward you starts to tear. Repeat these pre-shaping steps with the other dough ball. Once both loaves have been pre-shaped, leave them on the counter or cutting board and cover them with a towel for 15 to 30 minutes to rest. This rest time will help the loaves relax and be ready to be stretched into the final loaf shape.
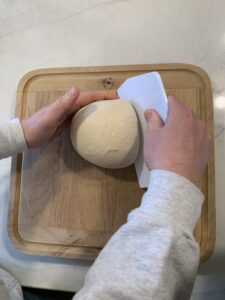
Final shaping the sourdough bread loaves
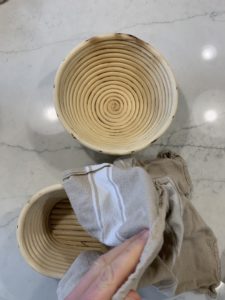
The final shape of the sourdough bread loaves is your last chance to build in the last bit of structure before proofing. After this point, you are not going to want to manipulate the loaves too much. Start by preparing your bannetons by laying a tea towel over the banneton. Then sprinkle the tea towel with a tiny bit of flour. The goal here is not to flour the towel but to allow the loaf to release from the towel easily after it has been proofed. Think of this banneton as a little bed that your final shaped loaf will proof in. There are several ways to shape the dough but we will go over two easy methods here.
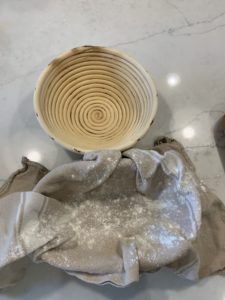
Shaping the round boule
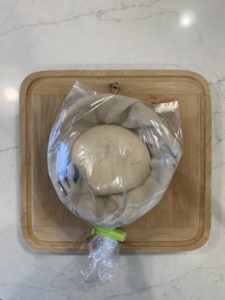
This shape is exactly like it sounds. It is a round loaf and you will be shaping it to fit in a round banneton. To create this final shape you will be repeating the pre-shape instructions above. The goal here is to get a nice tight outer skin on a ball-shaped loaf. Gently pick this loaf up and place it “seam side” up in the banneton. This means the side that you stretched should be facing down and there should be a loose area or seam that is facing up. You can pinch this seam shut ensuring that the ball stays tight. You can place it in a plastic bag for longer proofing in the refrigerator if you are not planing to bake the same day.
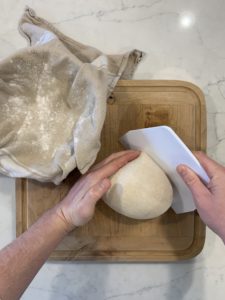
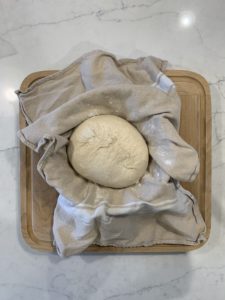
Shaping an oval boule
This shape is more of an oblong loaf. Again you will be using an oval banneton to proof the dough after the final shape. To create this shape you will be manipulating the dough more. First, place your rested loaf with the stretched side down. Then, gently pat the dough down into a circle so that you can fold the dough over on itself. Grab the circle at the top left and top right, the 10 ‘o clock and 2 ‘o clock positions. Gently lift and fold those pieces toward the center. Now your loaf should resemble a bike seat. Take the middle portion furthest from you and fold it toward the center. Turn the dough around so that the side that you have not folded is away from you. Repeat the folds above on this side. Turn the dough 90 degrees. Roll the dough away from you allowing your fingers to push into the dough. You should feel the tension grow on the side that is touching the counter or cutting board. Once the loaf is rolled up, pinch the ends of the dough to seal them. Gently lift the loaf and place it in the banneton “seam side” up. Again pinch the seam to seal it.
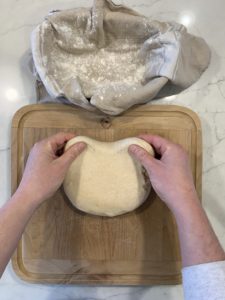
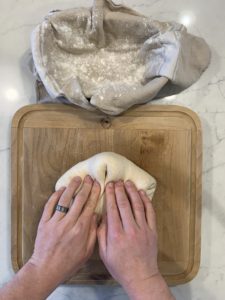
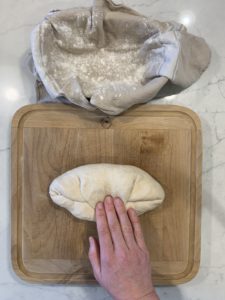
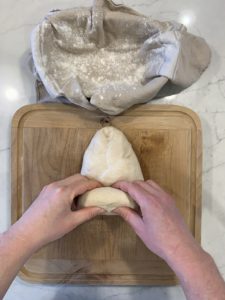
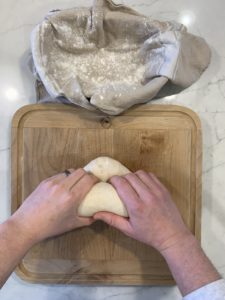
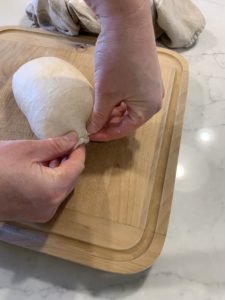
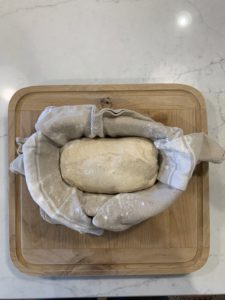
Once you have your loaves resting in the bannetons. You can Cover them with another tea towel and let them proof on the counter if you are baking that day. However, we recommend putting them in a plastic bag and placing them in the refrigerator overnight.
Proofing your loaves
Proofing is the second rise of the dough, this stage is also a period that allows the yeast to build up more gas and flavor in the bread. The longer you allow the dough to proof the more flavor you will obtain in your bread. However, you can over-proof your bread which will cause the dough to not rise in the oven, resulting in a dense loaf. You can also underproof your bread, which means that the yeast in the dough inflates too much in the oven and can result in cracking and tearing of the shape.
You can test to see how proofed your dough is but simply poking it with a finger. As you will learn when making bread, the underproofed dough will spring back almost immediately. The correctly proofed dough will spring back slowly, it will take a few seconds for this to happen. The over-proofed dough will never return to its original shape. Keep this in mind if you are planning to bake the same day as you mixed your dough. If you are doing a longer proof in the refrigerator, you will need to pay attention to this when you take your dough out.
Baking your sourdough bread
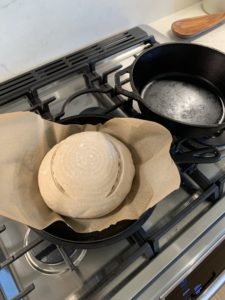
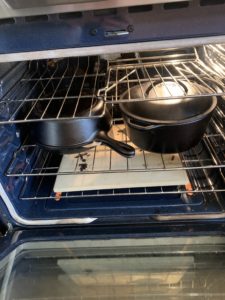
Once your bread is properly proofed, it is the time that you have been waiting for, Baking! Preheat your Dutch ovens by placing them in your regular oven set to 450 degrees. This will help the cast iron to be completely heated through before you put your bread in. As the oven comes up to temperature, take your loaves out of the fridge and transfer them to a piece of parchment. It is helpful to place the parchment over the top of the banneton and them flip the whole thing over. The goal here is to not disturb the loaf.
Once the oven is hot, you can score your loaves with your bread lame. There are all sorts of methods and styles of scoring bread. The goal that you are trying to accomplish with the score is to allow the loaf to expand in a controlled way. If the score is not there, or if it is not deep enough, when the bread expands in the oven it will crack and tear. To score the bread, take a bread lame, a razor, or a sharp knife. Cut into the loaf at a gentle angle, making sure that you cut at least 1/2 in into the loaf. You will learn what works best for you as you get more comfortable with scoring.
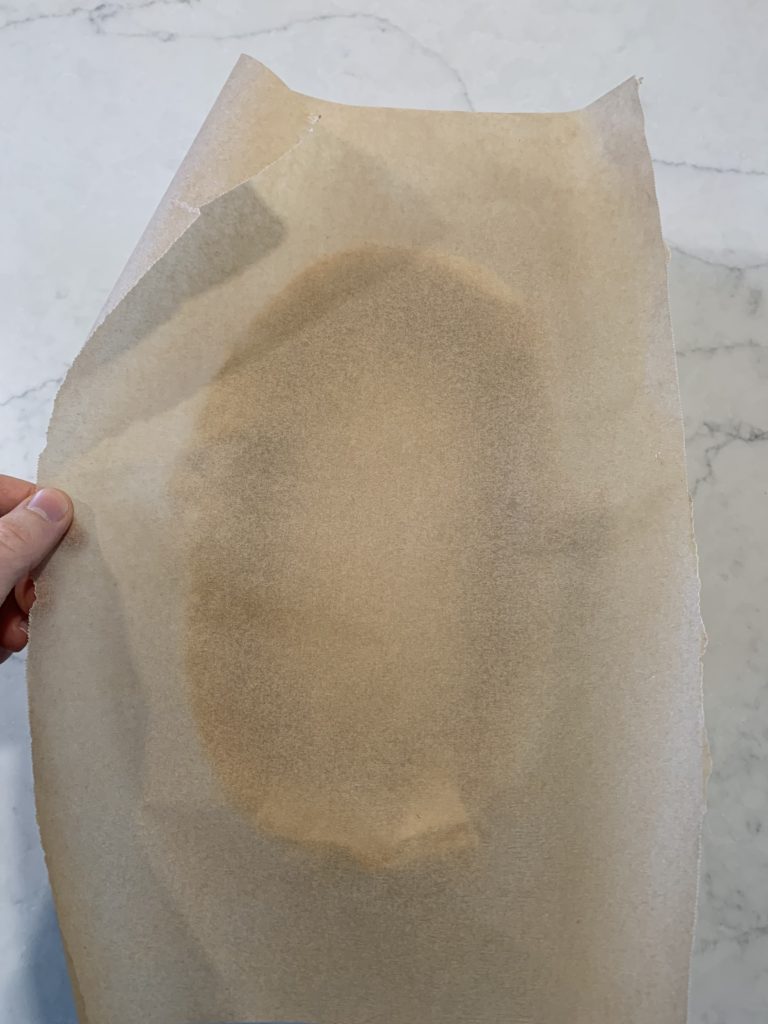
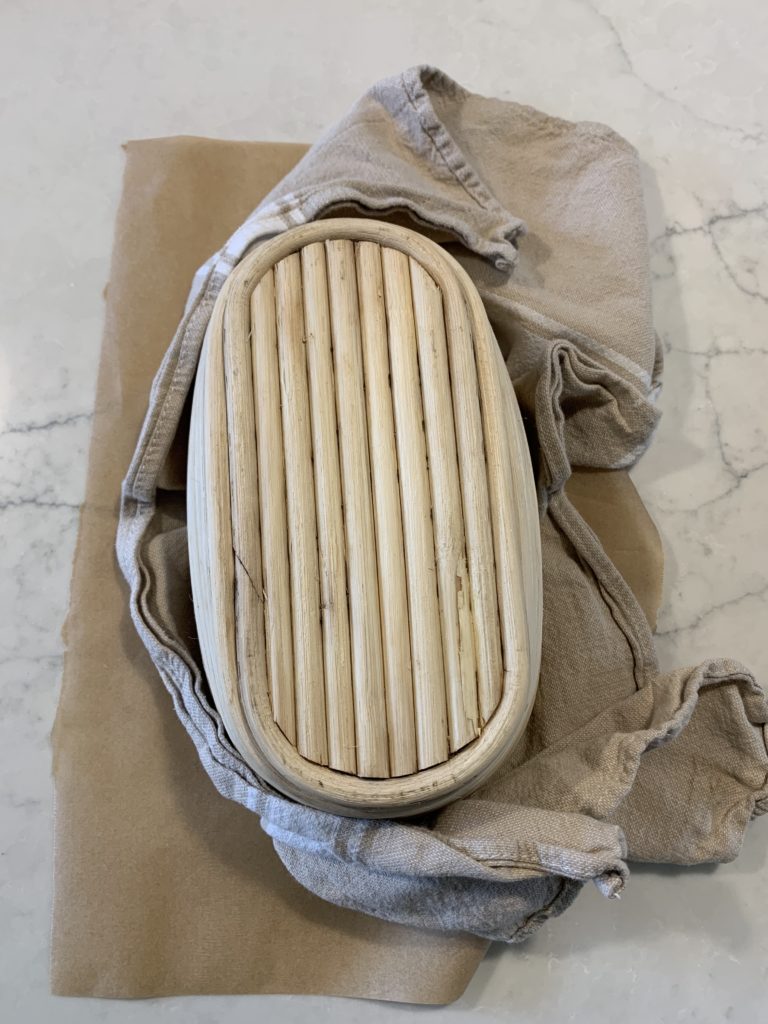
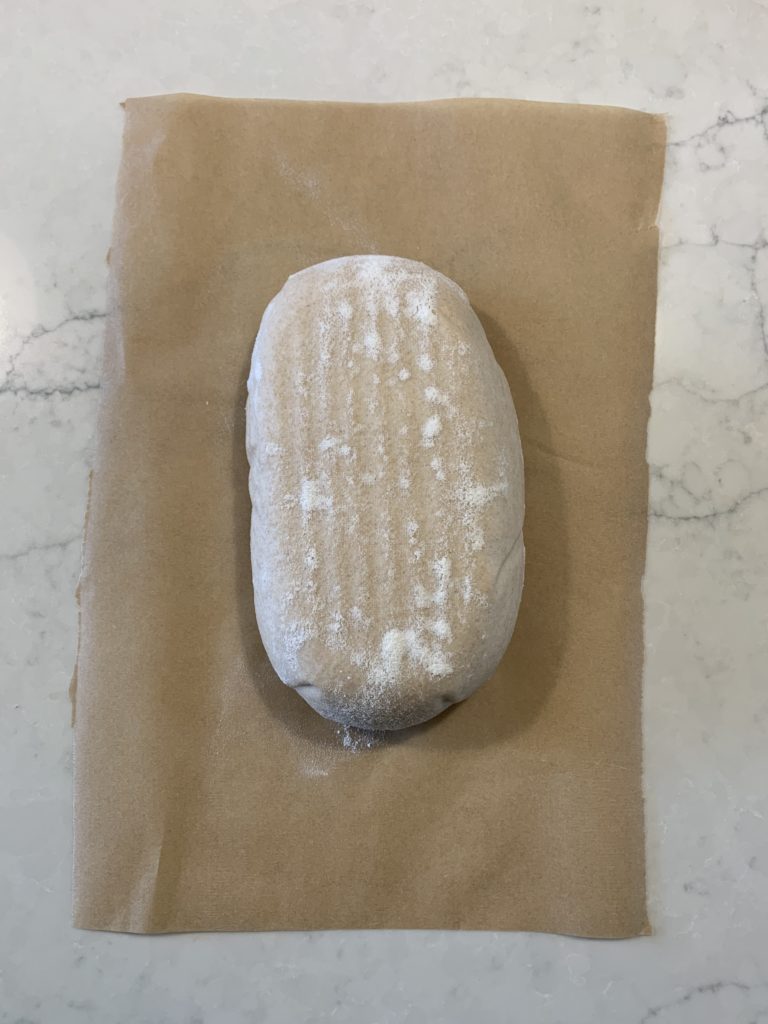
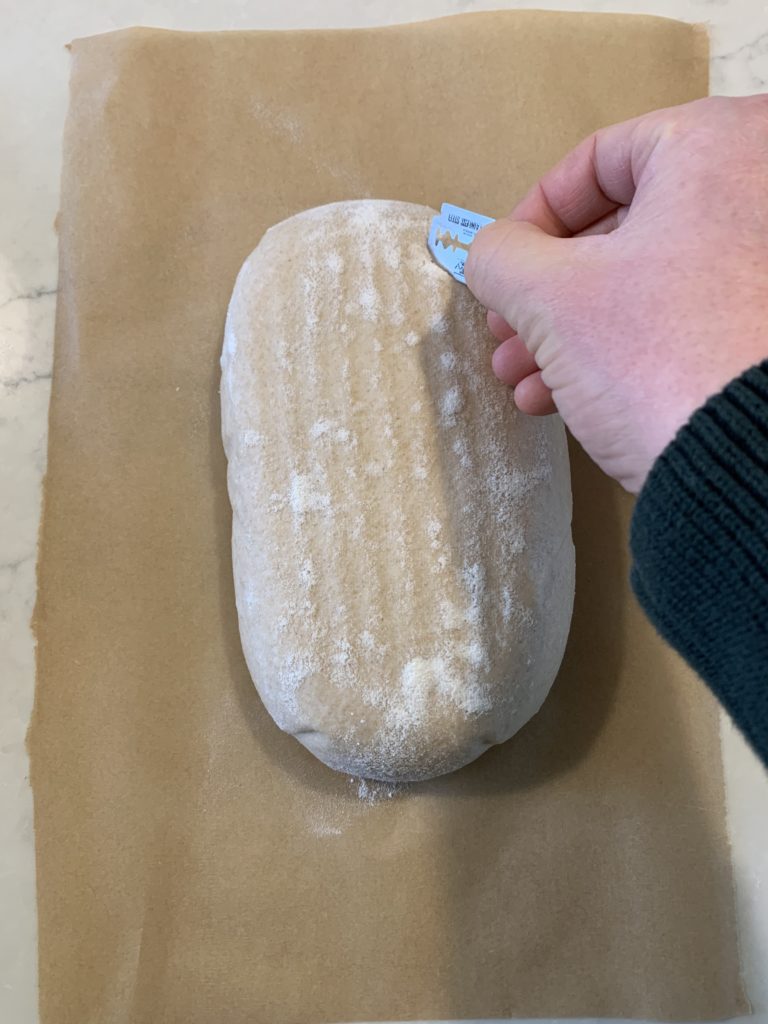
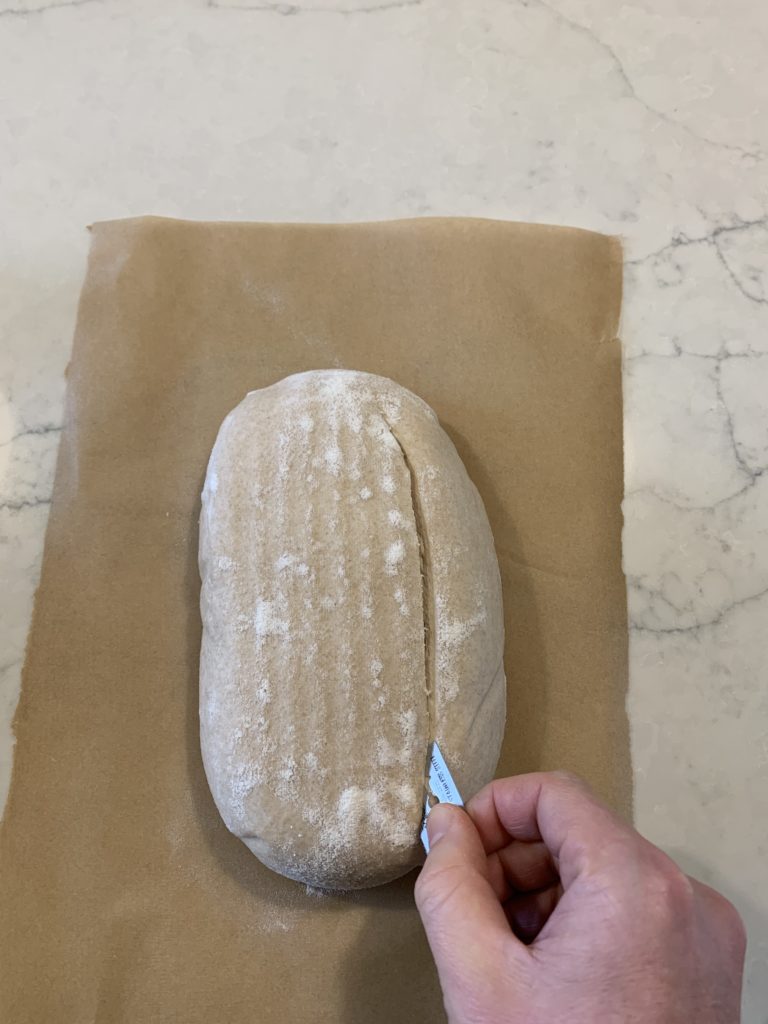
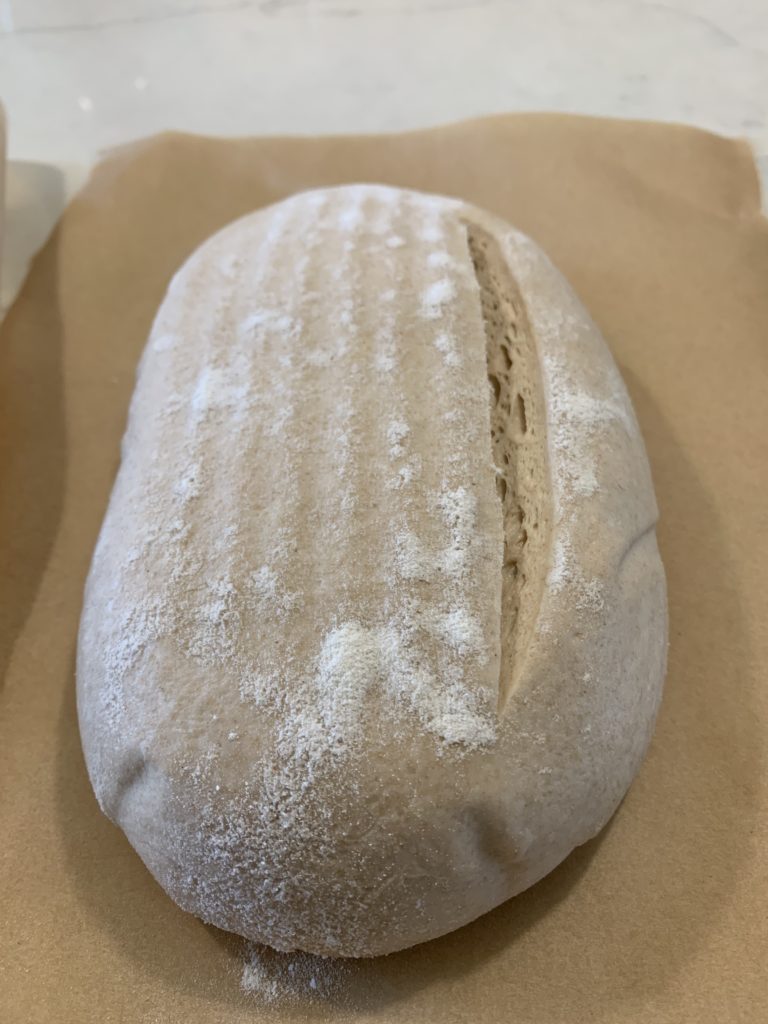
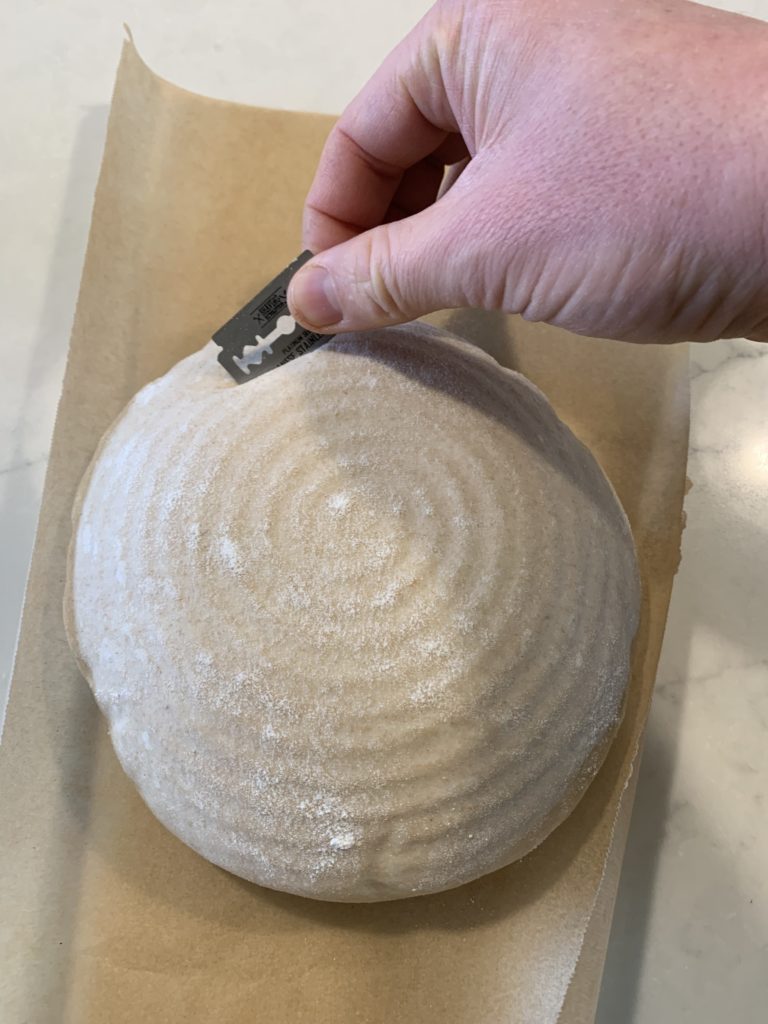
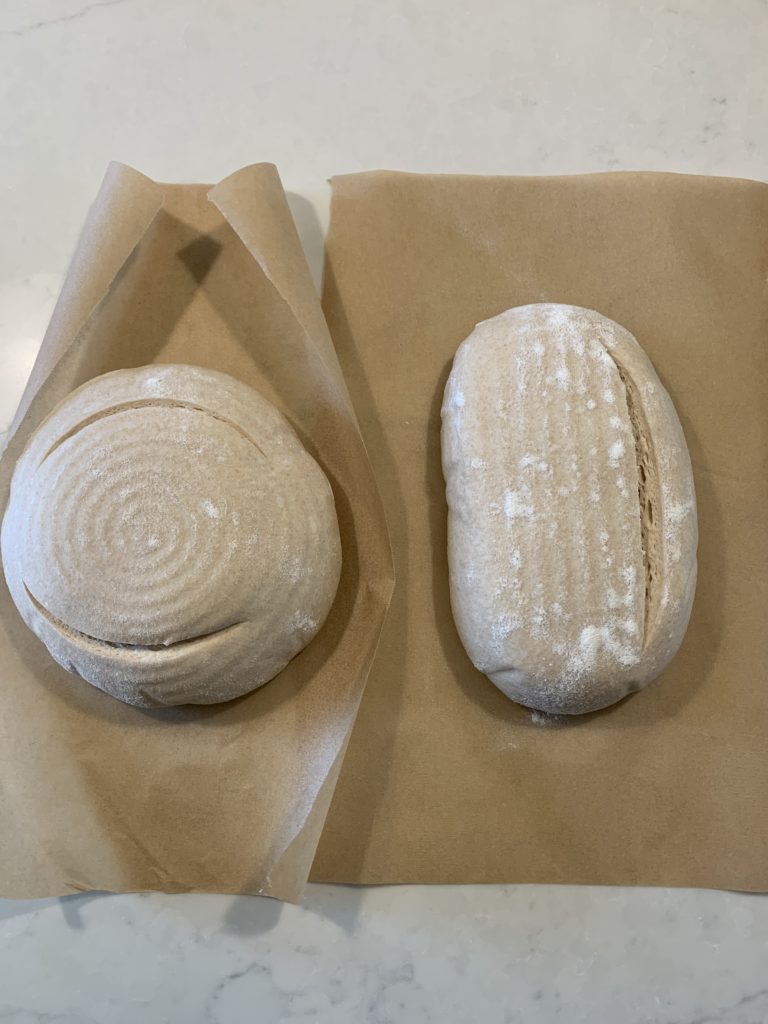
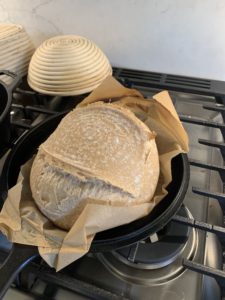
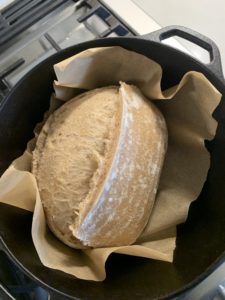
Once your loaves are scored, place them inside your preheated Dutch ovens and bake covered for 20 minutes. During this time, the Dutch oven will hold in the steam from the bread and allow the bread to have an “oven spring.” Oven spring is when the yeast is activated by the heat of the oven and they produce a ton of gas. This makes your loaves expand in the oven. After 20 mins, your bread will be ready to be uncovered. Bake uncovered for another 8 to 10 mins. During this time the outside of the bread will become crusty and golden brown. The bread should be done after this time, you can also double-check with an instant read thermometer plunged into the center of the bread. If the thermometer reads over 200 degrees Fahrenheit then the bread is fully baked and ready to be cooled. Baking should only take about an hour from start to finish and most of that time is just waiting.
Cooling the sourdough bread
Many folks like to think that they are done after the baking process and technically they are right. However, if you can take the bread cooling as seriously as the bread baking, then your loaves will taste better. While your bread is finishing baking, you can place a wire rack over a towel. Once the loaves are baked, you can set them on top of the wire rack. This will help air circulate around the loaves allowing them to cool evenly and allow the crust to remain crunchy. The towel will catch any condensation from the surrounding surfaces.
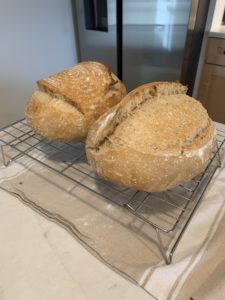
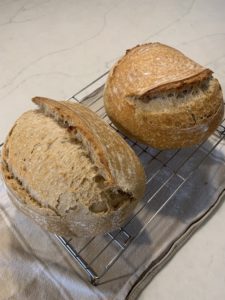
Also, do not cut into the bread before the bread has cooled completely. The reason for this is that there is flavor in the hot steamy air that is trapped in all of those little air bubbles in the bread. You want that moisture and flavor to stay inside the bread and to be absorbed back into the loaf. This will improve the flavor as well as preserve the soft crumb texture. If you cut into the loaf too soon, the steam will escape and you lose that flavor to the atmosphere. Cooling the bread can take a couple of hours but this is extremely flexible and can work with your schedule.
Once the bread is completely cooled, you can place it into a plastic bread storage bag. The bread should be good for up to a week. However, you will probably devour this bread way before then. If you need to extend the life of the bread you can freeze it in a freezer-safe bag for several months. We hope that this recipe will help you make time for bread baking. Add this easy sourdough bread recipe for busy people into your routine. If you make this recipe, please let us know in the comments below!
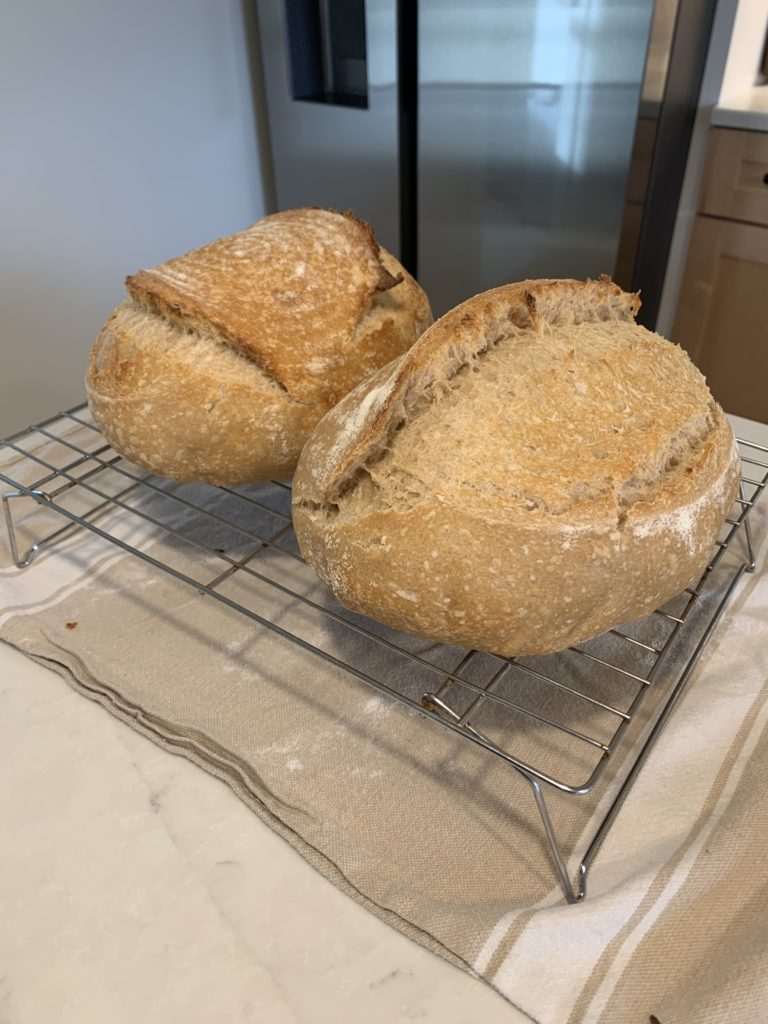
Easy sourdough bread recipe for busy people
Description
This is an easy and forgiving recipe for beginners or busy bakers. This recipe will produce two sourdough loaves. The recipe is created in a way that allows you flexibility in planning your day while producing extremely reliable bread.
Ingredient List
Instructions
Day 1 Preparing The Preferment
-
Making The Preferment
Feed Starter a few hours before you make the preferment. Once the starter is active, mix 30 grams of the starter with 120 grams of water. Stir to combine. Then mix 120 grams of all-purpose flour into your liquid mixture and stir until all the flour is absorbed. Cover the bowl with plastic wrap and leave on your counter for 10 to 14 hours.
Day 2 Making The Dough
-
Mixing The Dough
Add 520 grams of water to the preferment bowl and stir. In a separate bowl, add 600 grams of all purpose flour, 200 grams of whole wheat flour, and 3 teaspoons of salt. Mix to combine the flour. Then add the liquid to the flour and mix until it becomes a shaggy dough. Cover this bowl with a towel and let it rest for an hour.
-
Making the letter folds
Uncover the dough. Grab the one side of the dough and pull up, gently stretching the dough. Then place this portion of dough down in the middle of the dough ball. Repeat on the opposite side until all four sides have been stretched and folded to the middle. The dough should slightly resemble a folded envelope. Cover the dough bowl again with the towel and let it rest for 30 minutes. After 30 minutes, repeat the folding steps above. Repeat this folding and resting method four times. On the fourth time, the the dough rest 60 to 90 minutes.
-
Preshaping the boules
Divide the rested dough into two pieces. Preshape each loaf into a tight ball by slowly dragging the dough toward you and rotating it. Once the loaves are preshaped, let them rest again for another 30 minutes by covering with a towel and letting them sit on the counter.
-
Finish Shaping
Line a banneton with a towel that has been lightly floured. Then final shape the boule using the desired method for shaping. If making a round boule, repeat the preshaping steps above. If making an oval boule, flatten the dough ball with the tightened side down. Then fold the corners to the middle, then fold the sides to the middle. Turn the dough 90 degrees and roll the dough up, pulling it toward you to create a tight log shape. Then pinch the sides and seam shut. Place either of these shapes seam side up in the banneton.
I same-day baking, cover these loaves with a towel for about an hour. If baking the next day, place the bannetons in a plastic bag and seal. then place the banneton in the refrigerator overnight.
Day 3 Baking Day
-
Preheat Dutch Ovens
Place the Dutch ovens with the lids open in your regular oven. Then heat them to 450 degrees. This will allow the metal to be thoroughly heated through before placing your bread in the Dutch oven.
-
Prep And Score The Loaves
Take the bannetons out of the fridge. Transfer the loaves from the bannetons to a piece of parchment paper. Check to make sure that the loaves are properly proofed and then score. Score the bread at least once in a single direction about one-half inch deep.
-
Bake The Loaves
Carefully place the scored loaves into the hot Dutch ovens. Place the lids on the Dutch ovens and bake for 20 minutes. After 20 minutes, remove the lids and continue baking for another 8 to 10 minutes or until the internal temperature reaches 200 degrees Fahrenheit.
-
Cooling The Loaves
After the loaves are fully baked. Remove them from the oven to a wire rack. Let them cool completely before cutting into the loaves. Once cool, you can slice and store in a plastic bag. The bread will last for several days on the counter or up to a few months in the freezer.
